Configuration
VADAAR will work out of the box with minimal configuration that takes place in the user interface. In order to provide a more secure operational environment, it is recommended to configure HTTPS, ExternalUrls and Authentication Token Signing to harden your deployment.
- Windows
- Linux
- Configure any firewalls if required. If default configuration options are used, this will require opening ports 8442 (HTTP) and 8443 (HTTPS) for inbound network traffic.
- VADAAR Server can now be started using Windows Services.
- Configure any firewalls if required. If default configuration options are used, this will require opening ports 8442 (HTTP) and 8443 (HTTPS) for inbound network traffic.
- VADAAR Server can now be started using the command
systemctl start vadaar-server.
First Launch
Now that you have a running server, the user interface can be accessed using a modern web browser (Chrome, Edge or Firefox). Enter the URL of your server into the browser.
If unsure of the URL you can use http://localhost:8442 on the same machine that the server is running on. If attempting to access from a remote machine, change localhost to the machine name or IP address of the server.
If you are unsure as to how to remotely connect to the workstation, we recommend contacting your local Network Administrator for assistance.
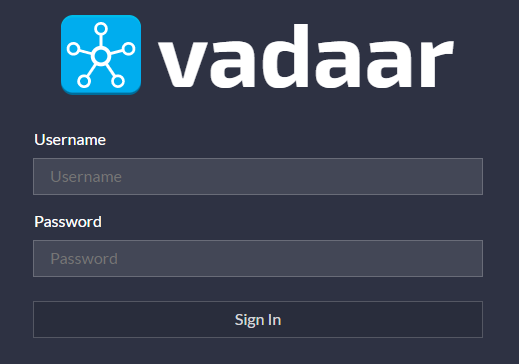
You should now see the above login page, enter the below credentials to gain access to the server:
- Username: Administrator
- Password: password
Now that you have access to the server, it is recommend to create a new Administrator User from within the Settings section and then disable access to the default Admin account.
Licensing
Using a modern web browser, enter your administrator credentials and navigate to the Settings section. From within here, navigate to the Licensing section. If you have an internet connection, you can use the Online method to license VADAAR. Select the Online Activation button on the toolbar and follow the on-screen steps to activate your VADAAR instance. Alternatively, you can select the Offline Activation button on the toolbar and follow the on-screen steps to activate your VADAAR instance without an internet connection.
Advanced Configuration
Advanced settings can be adjusted by creating a settings.json file in the application directory.
- Windows
- Linux
- Create a settings.json text file located in
C:\ProgramData\VADAAR-Server\settings.json- There will also be a settings.json.example file here for reference.
- Refer to Settings file example in this Documentation section titled "Example JSON Settings file" and add the necessary configuration options for your environment.
- Restart VADAAR Server using Windows Services for changes to take effect.
- Create a settings.json text file located in
/usr/share/vadaar-server/settings.json- There will also be a settings.json.example file here for reference.
- Refer to Settings file example in this Documentation section titled "Example JSON Settings file" and add the necessary configuration options for your environment.
- Restart VADAAR Server using the command "systemctl restart vadaar-server" for changes to take effect.
Available Options
Find below a list of available options that can be used to configure your instance of VADAAR Server.
| Option | Description |
|---|---|
| ExternalUrls | A semi colon (;) delimeted list of URLs that are used to access the Server. Any URLs that are not included will be disallowed access to the Server. Example: https://hostname;http://hostname;https://hostname:443;http://hostname:80 |
| HttpPort | The port to bind to in order to receive HTTP network traffic. |
| HttpsPort | The port to bind to in order to receive HTTPS network traffic. |
| HttpsCertificate:Thumbprint | A certificates thumbprint that will be searched for in the Windows Certificate Store in the current users Certificates and the Local Machines root Store. This functionality is only available on Windows Operating Systems. |
| HttpsCertificate:Filename | A filepath to the PFX Certificate to use for HTTPS encryption. |
| HttpsCertificate:Password | Optionally specify the password for the Certificate specified by the HttpsCertificate:Filename option. If no password exists, this option can be omitted. |
| HttpsCertificate:PemCertFilename | A filepath to the RFC 7468 PEM-encoded X509 Certificate and private key to use for HTTPS encryption. |
| HttpsCertificate:PemKeyFilename | If specified, the filepath to the PEM-encoded private key to use for HTTPS encryption. If unspecified, the HttpsCertificate:PemCertFilename file will be used to load the private key. |
| HttpsCertificate:PemPassword | Optionally specify the password for the encrypted PEM specified by the HttpsCertificate:PemCertFilename option. If no password exists, this option can be omitted. |
| AuthTokenSigningCertificate:Thumbprint | A certificates thumbprint that will be searched for in the Windows Certificate Store in the current users Certificates and the Local Machines root Store. This functionality is only available on Windows Operating Systems. |
| AuthTokenSigningCertificate:Filename | A filepath to the Certificate to use for OAuth token signing. |
| AuthTokenSigningCertificate:Password | Optionally specify the password for the Certificate specified by the AuthTokenSigningCertificate:Filename option. If no password exists, this option can be omitted. |
| ReverseProxy:XForwardedProtoEnabled | Specify true to lookup the protocol used by the client that initiated the request from the X-Forwarded-Proto HTTP header. |
| ReverseProxy:XForwardedHostEnabled | Specify true to lookup the host from the X-Forwarded-Host HTTP header. Usually proxies don’t modify the host header, use this option with caution. |
| ReverseProxy:KnownNetworks | A semi colon (;) delimeted list of address ranges of known networks to accept forwarded headers from. Provide IP ranges using Classless Interdomain Routing (CIDR) notation. If the server is using dual-mode sockets, IPv4 addresses are supplied in an IPv6 format (for example, 10.0.0.1 in IPv4 represented in IPv6 as ::ffff:10.0.0.1). |
| ReverseProxy:KnownProxies | A semi colon (;) delimeted list of addresses of known proxies to accept forwarded headers from. Use KnownProxies to specify exact IP address matches. If the server is using dual-mode sockets, IPv4 addresses are supplied in an IPv6 format (for example, 10.0.0.1 in IPv4 represented in IPv6 as ::ffff:10.0.0.1). |
| CorsPolicy:EnableCors | Specify true to allow Cross-Origin Requests (CORS) from origins other than the Server. |
| CorsPolicy:AllowAnyOrigins | Specify true to allow any Origin to access the Server. |
| CorsPolicy:AllowedOriginsList | Specify an array of Origins that can access the Server. |
| CorsPolicy:AllowAnyHeaders | Specify true to allow any Headers. This affects preflight Access-Control-Request-Headers and should match. |
| CorsPolicy:AllowedHeadersList | Specify an array of Headers that will be accepted. This affects preflight Access-Control-Request-Headers and should match. |
| CorsPolicy:AllowAnyMethods | Specify true to allow any HTTP Methods. This affects preflight Access-Control-Allow-Methods. |
| CorsPolicy:AllowedMethodsList | Specify an array of HTTP Methods that will be accepted. This affects preflight Access-Control-Allow-Methods. |
| CorsPolicy:ExposedHeadersList | Specify an array of custom headers that will be available to the client making a CORS request, in addition to the default simple headers. |
| CorsPolicy:AllowCredentials | Specify true to allow a CORS request to include the signed in users credentials. This affects the Access-Control-Allow-Credentials header. Allowing cross-origin credentials is a security risk. A wesite at another domain can send a signed-in users credentials to the server without the user’s knowledge. If the server is configured to allow credentials, then the AllowAnyOrigins field cannot be used and you must explicitly fill out the allowed origins using the AllowedOriginsList field. |
| UseEmbeddedDatabaseServer | Specify true to use the inbuilt provided Postgres database, otherwise false to use your own Postgres supplied database. |
| EmbeddedDatabaseServer:DataPath | The location where the inbuilt Postgres database will persist its data. |
| ConnectionStrings:ApplicationDatabase | The ‘Connection String’ for the Postgres database if the inbuilt database is not being utilized. |
| StorageDisks:Default:DisplayName | The user friendly name of the Default storage disk that will be displayed in the User Interface. |
| StorageDisks:Default:Location | The location of the data persisted for the Default storage disk |
| LogPath | The location where log files will be stored. |
| AccessTokenLifetime | The lifetime of access token in seconds. |
| TemporaryAccessTokenLifetime | The lifetime of the temporary access token in seconds. This token is utilized by Sender while recording and by Viewer during playback. As a result, you should consider the token’s lifetime within the context of what the expected maximum duration of a recording or playback session would be. |
| RemoteDesktopControl | Specify true to enable Remote Desktop Control. False by default. |
| Ldap | Configure to enable LDAP as an authentication method. See LDAP for the full configuration. |
Settings can be configured, in order of precedence, using the following methods:
- Command Line Arguments
- Settings.json file
- Environment Variables
When using command line arguments, the name of the option should be prefixed with a double hyphen (--), followed by the option name and then an equals (=) character followed by the desired value of the option. An example for configuring ConnectionStrings:ApplicationDatabase: --ConnectionStrings:ApplicationDatabase="Host=postgres;Port=5432"
When using the settings.json file, the option name reflects the fully pathed JSON key. Each colon (:) character represents a different JSON object. Refer to the "Example JSON Settings file" section below. When using environment variables, the name of the option should be prefixed with “VADAAR_” and any colon (:) characters should be replaced with a double underscore () instead. An example for configuring ConnectionStrings:ApplicationDatabase: `VADAAR_ConnectionStringsApplicationDatabase`
Example JSON Settings file
{
  "ExternalUrls": "http://host:8442;https://host:8443",
  "HttpPort": 8442,
  "HttpsPort": 8443,
  "HttpsCertificate": {
    "Filename": "",
    "Password": "",
    "Thumbprint": ""
  },
  "AuthTokenSigningCertificate": {
    "Filename": "",
    "Password": "",
    "Thumbprint": ""
  },
  "ReverseProxy": {
    "Enabled": true,
    "XForwardedForEnabled": true,
    "XForwardedProtoEnabled": true,
    "XForwardedHostEnabled": false,
    "KnownNetworks": "127.0.0.1/24;::ffff:127.0.0.1/24",
    "KnownProxies": "127.0.0.1;::ffff:127.0.0.1"
  },
  "UseEmbeddedDatabaseServer": true,
  "EmbeddedDatabaseServer": {
    "DataPath": ""
  },
  "ConnectionStrings": {
    "ApplicationDatabase": ""
  },
  "StorageDisks": {
    "Default": {
      "DisplayName": "Default Storage Disk",
      "Location": "path/for/disk/default"
    },
    "StorageDiskName1": {
      "DisplayName": "Disk 1",
      "Location": "path/for/disk/1"
    }
  },
  "LogPath": "",
  "AccessTokenLifetime": 3600,
  "RemoteDesktopControl": true,
}
Configuring Authentication Token Signing
VADAAR Server uses OAuth 2.0 for authentication and authorization. When a user signs in, they are issued a token which they can use for subsequent actions. This token needs to be cryptographically signed and, out of the box, VADAAR Server will generate the appropriate credentials for this. However, you can also provide a certificate for signing tokens as described below.
The certificate that you provide for Authentication Token Signing should be in the X.509 format compatible with the RS256 asymetric algorithm.
- Open your settings.json file
- Add a section named “AuthTokenSigningCertificate” and within it add the following values
- Thumbprint – Use this if VADAAR Server is running on Windows and the certificate you want to use is in the Windows Certificate Store under the current user’s Certificates or the Local Machine’s root Store.
- Filename – A filepath to the Certificate to use for OAuth token signing.
- Password – Optonally, add this if the file specified above is password protected.
- If running, please restart your VADAAR Server instance.
Configuring External Database
VADAAR Server is configured out of the box to use an embedded Postgres database by default. However, should you have the requirement to use an external Postgres database you will need to do the following steps.
VADAAR Server supports Postgres 14 by default. Other Postgres versions may work but they are not officially supported.
- Open your settings.json file.
- Add a key named “UseEmbeddedDatabaseServer” and set it to false.
- Add a “ConnectionStrings” section, if none exists.
- Within it add a key named “ApplicationDatabase”. The value for this should be the connection string to your database.
Configuring Remote Desktop Control
VADAAR has Remote Desktop Control disabled to avoid misuse out of the box. Once understanding the security implications of enabling this feature, Remote Desktop Control can be enabled by completing the following steps:
- Open your settings.json file.
- Add a key named “RemoteDesktopControl” and set it to true.
- Ensure VADAAR Senders are configured for Remote Desktop Control.
Enabling Remote Desktop Control may be a security risk as it allows complete control of the remote machine running VADAAR Sender to everyone that can access the VADAAR Senders stream.
Configuring Storage
VADAAR Server is preconfigured with a default Storage Disk that can be configured and in addition allows for adding multiple other Storage Disks. See Backup and Restore for default locations.
To configure the default Storage Disk:
- Open the settings.json file
- Add a section named “StorageDisks”
- Within the “StorageDisks” section, add a subsequent section called “Default”
- Within the “Default” section, add the following options:
- DisplayName - The user friendly name of the Default storage disk that will be displayed in the User Interface.
- Location - The location of the data persisted for the Default storage disk.
- If running, please restart your VADAAR Server instance.
To configure additional Storage Disks, you can follow the same steps to edit the Default Storage Disk, however instead of creating a “Default” section within the “StorageDisks”, you will need to create a uniquely named section instead.
Once you create a Storage Location using the custom Storage Disk, the unique name should not be changed.
You can now create Storage Locations using the configured Storage Disks from within the VADAAR Servers User Interface.
Caution is advised when configuring the ability to store data uploaded to the server. Attackers may attempt to:
- Execute denial of service attacks.
- Upload viruses or malware.
- Compromise networks and servers in other ways.
Security steps that reduce the likelihood of a successful attack are:
- Upload files to a dedicated file upload area, preferably to a non-system drive. A dedicated location makes it easier to impose security restrictions on uploaded files.
- Disable execute permissions on the file upload location.
- Do not persist uploaded files in the same directory tree as the server.
- Run a virus/malware scanner on uploaded content on the file.
The app's process must have read and write permissions to the storage location. Never grant the execute permission.
Configuring a NAS on Windows
Extra steps need to be taken to ensure that a NAS can be utilised as your chosen storage device on Windows.
- Perform a database backup. See Backup and Restore.
- Make sure Server isn't running.
- Delete the
Databasefolder. The default location can be found here. - Delete the
postgres-log.txtfrom the Log folder. The default location can be found here. - Edit the Windows Service for VADAAR Server by updating the logon account to one with the required permissions to the NAS location you're attempting to utilize. Ensure this account can log on as a Service.
- Configure your Storage Disk with the instructions above.